By J.J. Hebert, bestselling author & president at MindStir Media
As a bestselling author and president of MindStir Media, I use Bluehost to host and setup all of my WordPress blog sites – around 50 of them total. My WordPress sites generate hundreds of thousands of dollars each year, so it’s important that I use the best hosting company. I count on Bluehost hosting because it’s highly reliable and also very affordable (and the best, in my opinion). I’m not the only one depending on Bluehost. Bluehost powers over 2 million sites worldwide! Bluehost offers an anytime money-back guarantee, which also means there’s no risk for me (or you). They even provide a one-click automatic WordPress installation. This makes creating a WordPress blog site incredibly easy and fast (more about that later)… Never used WordPress before? WordPress is the leading blogging platform. Over 60 million people have chosen WordPress. Some well-known WordPress users include People, CNN, TechCrunch, New York Post, Mercedes-Benz, SiriusXM Canada, and many more…
Today, I’m going to quickly walk you through setting up a cheap Bluehost hosting account and then installing your free WordPress blog site to start using right away.
This tutorial, filled with helpful screenshots, is FREE. However, I do make some money when you sign up for Bluehost. This essentially pays me for my time in creating the FREE tutorial. Bluehost will pay me so you don’t have to. Great deal for you!
So if you’re serious about creating a WordPress blog/website like the well-known brands I mentioned above, please pay close attention to the following free instructions. They will make your life so much easier!
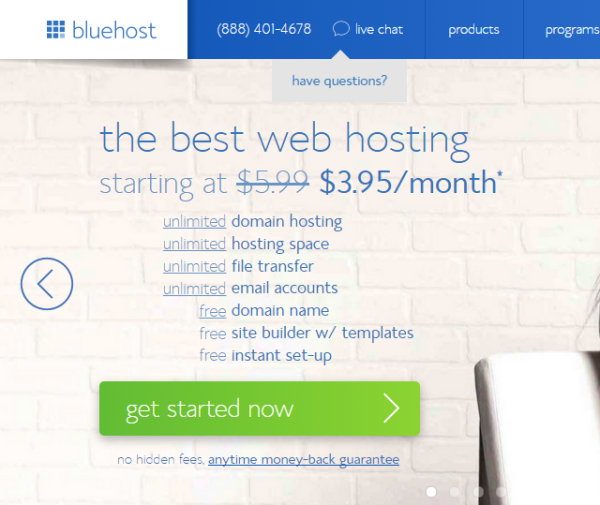
Step 1: Click here to start setting up your Bluehost account. Be sure to click that link so you get the discount I’m personally able to offer! You’ll be directed to a page like the one in the screenshot below. Once you’re there, click the green GET STARTED NOW button to begin.
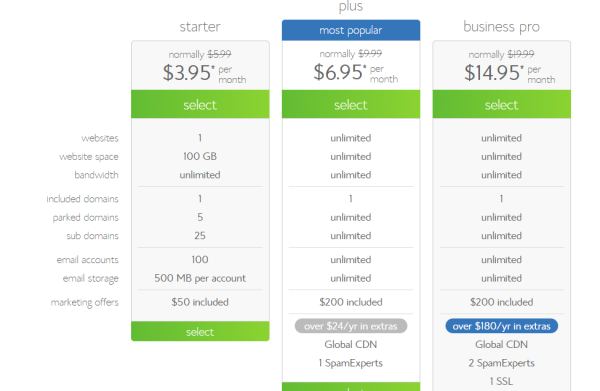
Step 2: Select a plan that works for you. I recommend the PLUS plan because it offers the capability to host unlimited blogs/websites in the same hosting account. This is an ideal option if you plan to create more than one blog or website. However, if this is going to be your only blog/website, then select the STARTER plan. Either way, click one of the green SELECT buttons when you’re ready to move forward.
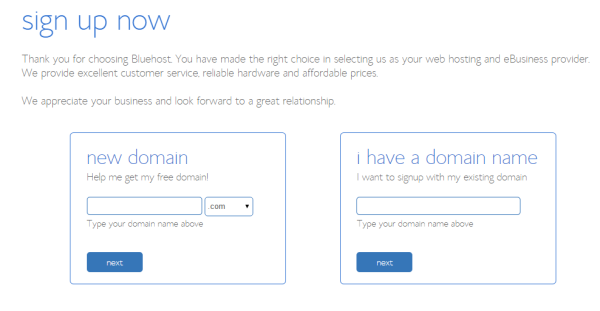
Step 3: This is where you’ll be asked to provide your new domain. I recommend using a .com domain, as that is the most popular option. Give some thought to your domain, as it will represent your brand.
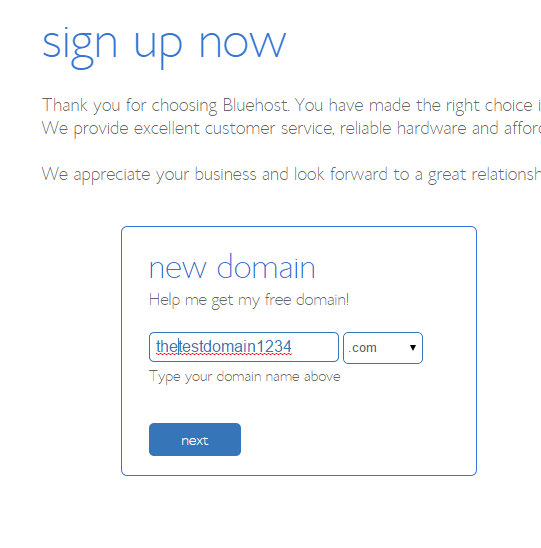
Step 4: After you’ve decided on a domain name, enter it into the field shown below and click NEXT. In this example, I’m using thetestdomain1234.com which is a domain I’m using strictly for this tutorial and don’t plan to develop.
If you still haven’t done so, make sure to click here to get the Bluehost discount! Then start at Step 1 shown above.
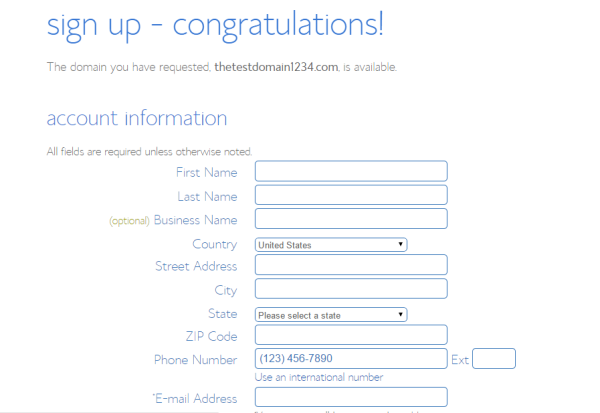
Step 5: Bluehost will then bring you to an area where you’ll need to enter your account information and billing information. Complete all the fields
Step 6: The next screen will try to sell you on upgrades. I usually don’t select any of the upgrades, but if you feel you need any of them go ahead and select an upgrade and then scroll down and click the COMPLETE green button.
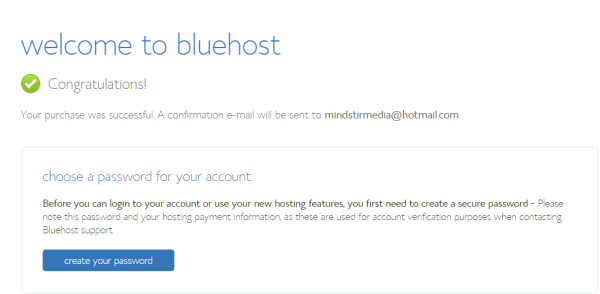
Step 7: Now you need to create your password. Simply click CREATE YOUR PASSWORD.
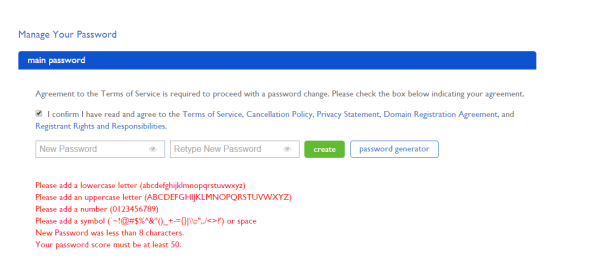
Step 8: Check the “I confirm I have read and agree” box and then enter your password in the “new password” field, and then retype that same password in the “retype new password” field. Hit the CREATE green button.
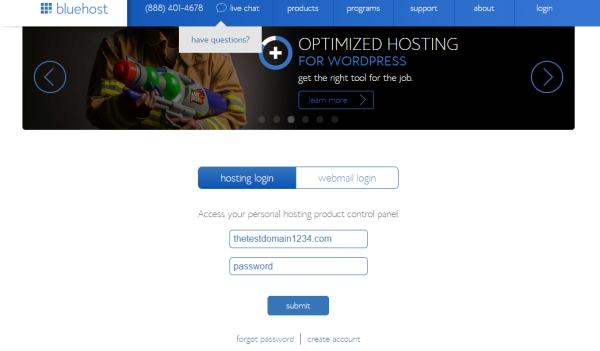
Step 9: You’ll be redirected to the Bluehost login page. This is where you should enter your password you created and then click SUBMIT.
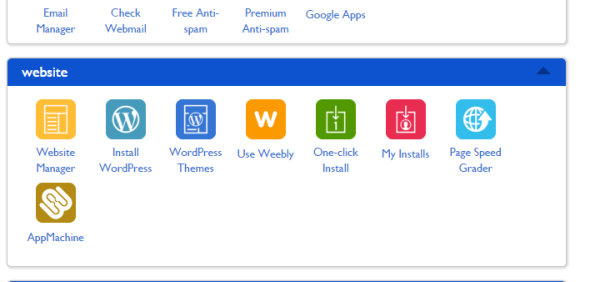
Step 10: Once logged in, click the HOSTING button on the top left-hand side of your screen. Then scroll down about halfway and click the INSTALL WORDPRESS button as displayed below.
If you still haven’t done so, make sure to click here to get the Bluehost discount! Then start at Step 1 shown above.
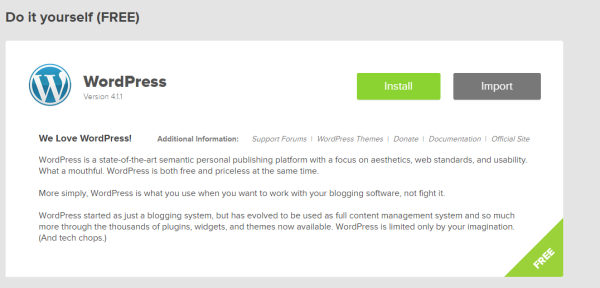
Step 11: This is where you install your free WordPress blog. Click the green INSTALL button.
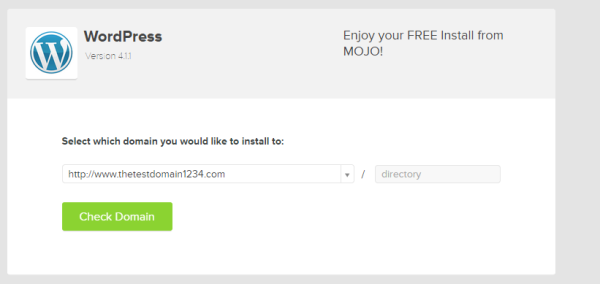
Step 12: Click CHECK DOMAIN.
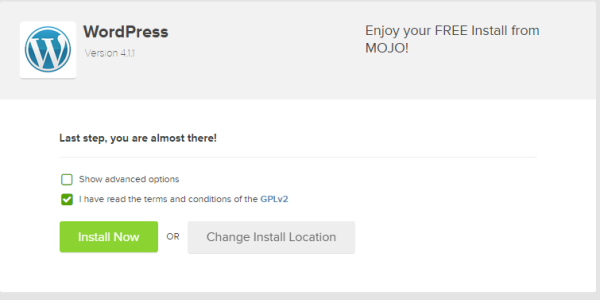
Step 13: Check the “I have read the terms and conditions” box and then click the INSTALL NOW green button.
Step 14: No action required on your part at this point. Notice that the top of your page states that your install is underway. You can keep an eye on the green status bar. This install process should take less than 1 minute.
Step 15: Once your install is compete,click the VIEW CREDENTIALS black button.
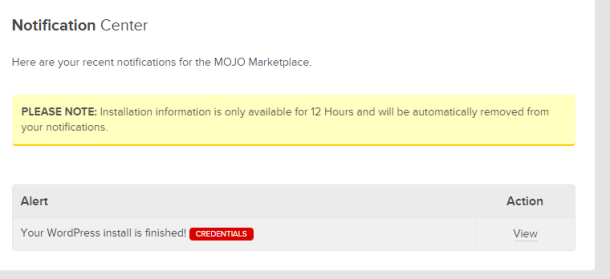
Step 16: In the Alert section, click VIEW under ACTION.
If you still haven’t done so, make sure to click here to get the Bluehost discount! Then start at Step 1 shown above.
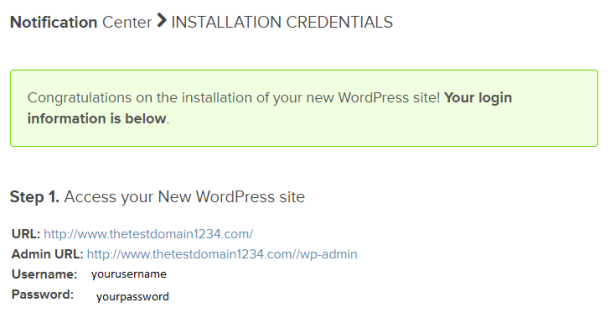
Step 17: This screen shows you your URL, ADMIN URL and USERNAME and PASSWORD. Click on the ADMIN URL.
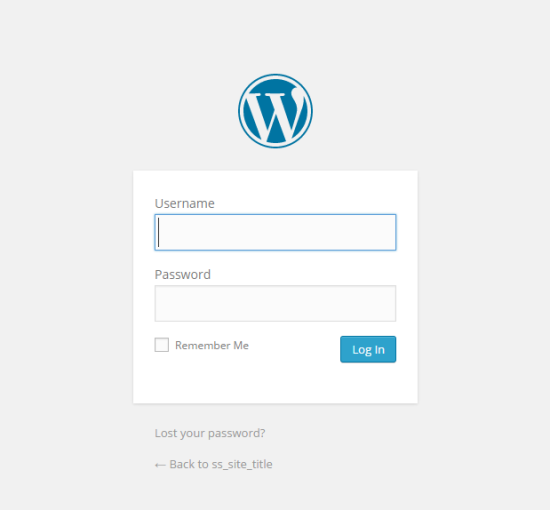
Step 18: That brings you to your login area for your WordPress blog. Enter your username and password in the appropriate fields and click LOG IN.
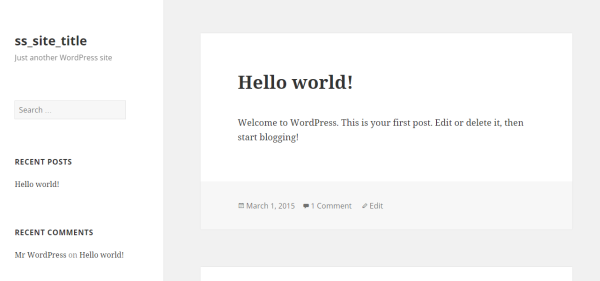
Step 19: Congratulations! You’ve installed your WordPress blog in about 5 minutes.
Step 20: Now that your WordPress blog is setup, consider using a different “theme” to really customize your blog and make it shine. A theme is essentially a pre-made design that you can manipulate. There are many themes out there for you to choose from. Here’s information about themes and how to use them.
Click here to start setting up your Bluehost account and follow the instructions above. You’ll have your WordPress blog setup in just a few minutes!


